

Hello! 👋
I am launching this blog with great excitement to present you an application that will allow you to generate your day-to-day schedules in Google Calendar, extract holidays, and create a template with all the sessions of a specific subject.
The idea for this application arose because for several courses I have used Javier Irimia’s “Event Generator in Calendar” precisely to create my schedule in the calendar, and it has worked very well for me. However, I wanted to be able to write it in timetable format and have it generate the classroom schedule as well.
Although I believe the functionality is quite intuitive and you probably won’t need instructions, I have created this guide for you to be able to use it without any issues.
⚠️ If you find any functional errors or have any improvements in mind, I would be delighted to read them in order to implement them in a new version. You can leave them in the comments.
1. Features
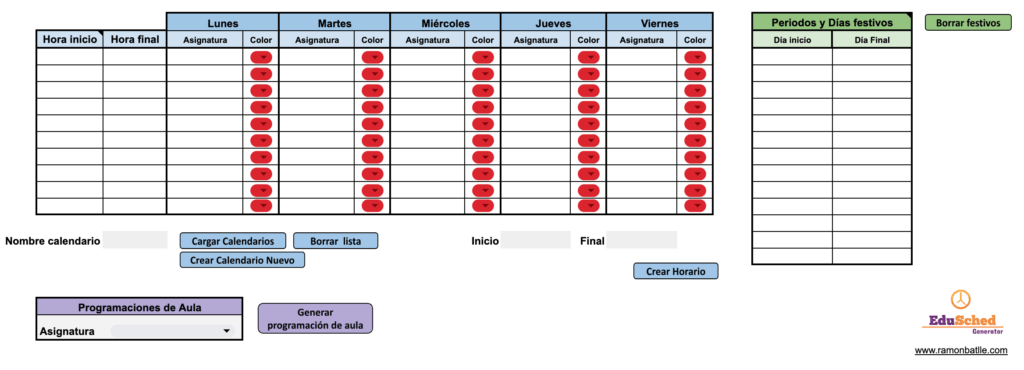
The application allows you to do the following:
- Create calendars from the spreadsheet.
- Import the names of all the calendars you have to choose where to place the schedule.
- Generate the schedule in the calendar indicating the day you want it to start and end.
- Choose a color for each subject that will be displayed in the calendar event.
- Exclude the schedule from holidays and non-working days.
- Generate a Document to create the daily class planning with the dates of all the sessions you have for each subject.
2. Operation Guide
2.1 Creating a calendar to include the Schedule
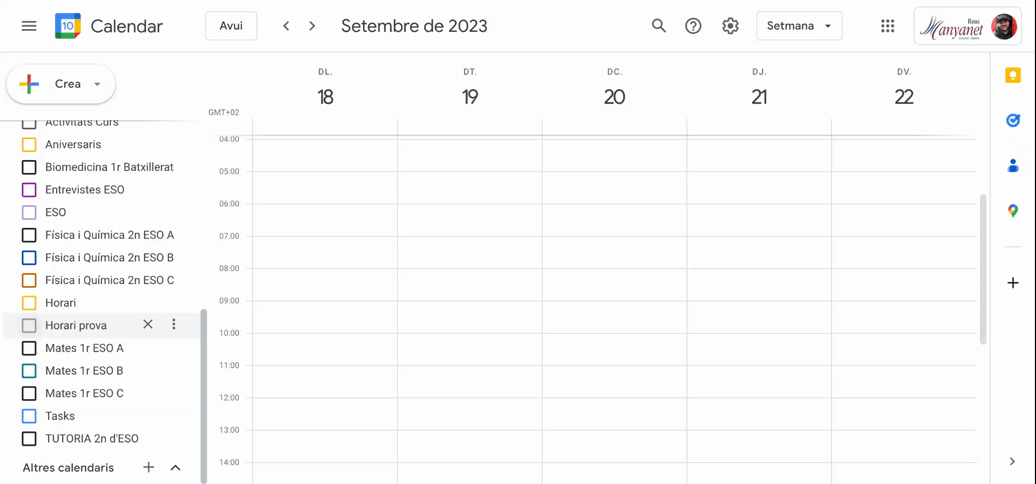
Although you can generate the schedule in any calendar you want, it is highly recommended to create a dedicated calendar exclusively for the schedule. Keep in mind that this calendar will have many weekly events created, and you may find it useful to hide it at times in order to view the rest of your events or meetings with just one click.
You can do this directly in Google Calendar, but the program has a feature to create a calendar without the need to go to Google Calendar.

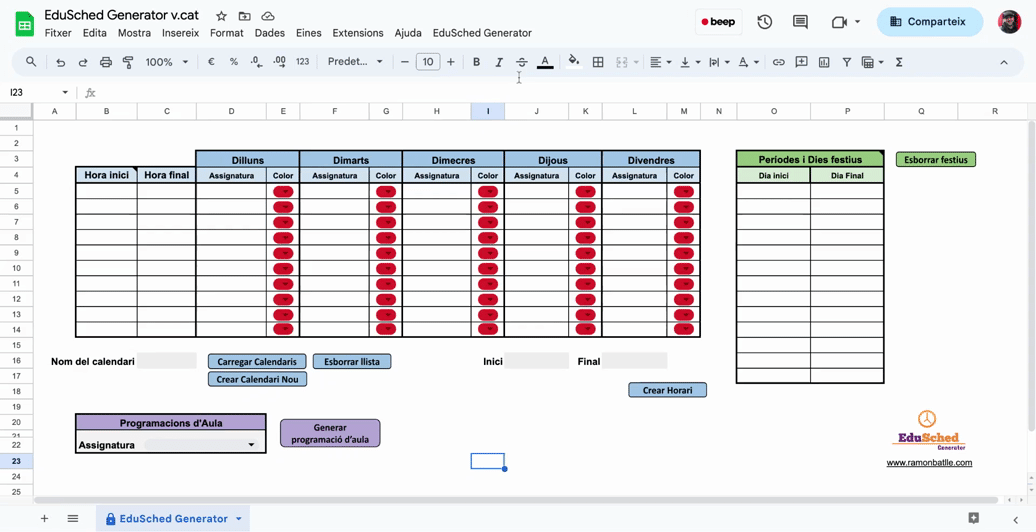
To do this, you need to go to Create a new calendar. You can access it from the top bar EduSched Generator/ Calendars / Create a new calendar or directly with the button displayed on the screen. Enter the name of the calendar and wait for the confirmation message.
Your calendar has been created in Google Calendar! 🎉
2.2. Load the list of calendars
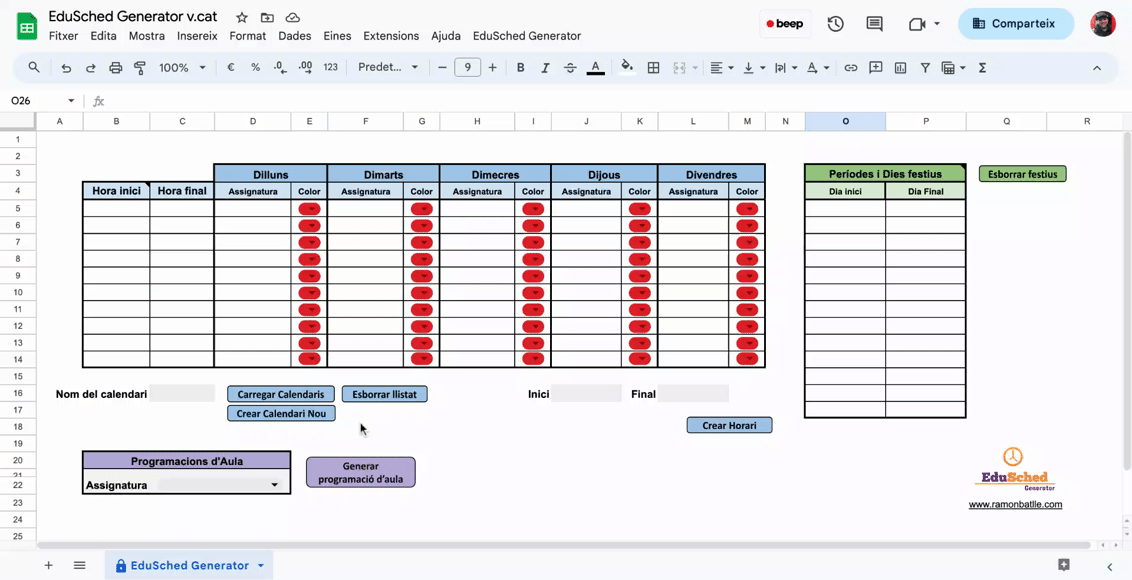
To select the calendar in which you want to create your schedule, you need to load them into the list after creating the new calendar.
To do this, press the Load Calendars button or go to the top bar and select EduSched Generator/ Calendars / Load Calendars list.
You can also clear the list of calendars by pressing the Clear List button or going to the top bar and selecting EduSched Generator/ Calendars / Clear Calendars List.
It is not necessary to clear the list when generating new calendars. If you press Load Calendars, the new list will overwrite the old one.
2.3. Creating the Schedule
At this point, with the selected calendar in which we want to generate the schedule, it’s time to write the schedule.
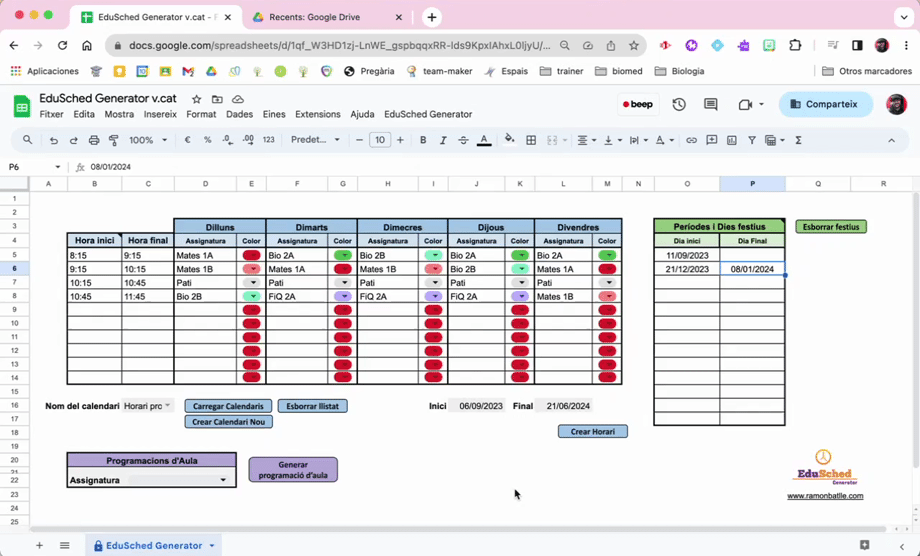
It is important to note that the time format should be as follows: hh:mm.
We can also select the colour of the different subjects so that they appear in the calendar in the same way. In the colour cell, we have the different options offered by Google Calendar.
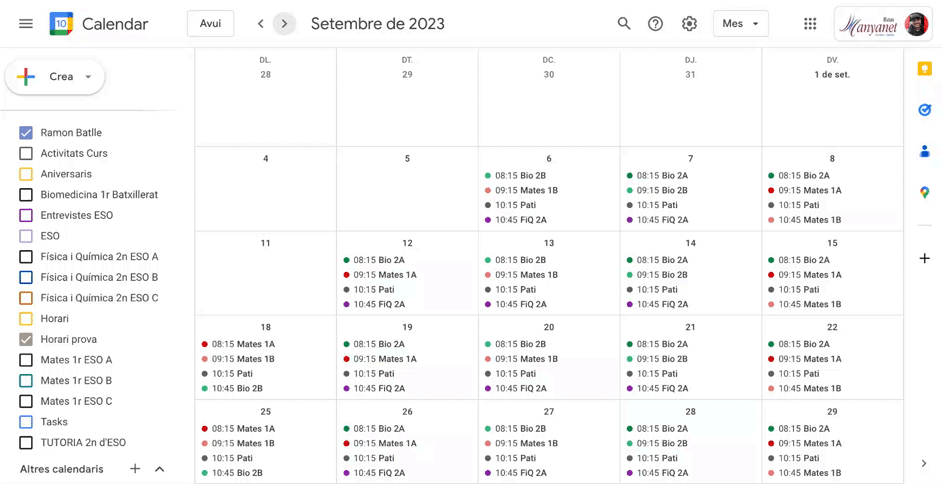
Once we have written our entire schedule, we need to set a start date and an end date, indicating the period when the schedule will repeat in our calendar. By double-clicking on the cell, a calendar will open where we can select the days.
Finally, click the Create a Schedule button or go to the top bar and select EduSched Generator/ Create a Schedule.
This process may take a few minutes, depending on the number of days and events the program needs to create. In any case, a screen will appear informing you of the estimated time it may take for the process to complete.
Your schedule has been created in the selected Google Calendar! 🎉
2.4. Remove holidays
Once we have the schedule in our calendar, we can remove events from days or periods when we don’t work.
To do this, go to the green section: Holidays and double-click on the cells corresponding to the Start Day and End Day. This will open a calendar where we can select the dates we want to remove from our schedule.
There are two options to remove events:
- Single holiday days: 👁❗️ Select only the day in the Start Day cell and leave the End Day cell blank. As before, you can double-click and open a calendar to select the day.
- Holiday periods: Select the Start Day and End Day.
👁❗️ The schedule will not be deleted on the day specified in the End Day cell. For example, if you set 13/9/2023 as the start and 15/9/2023 as the end, the schedule will be removed for 13/9/2023 and 14/9/2023, but it will still appear on 15/9/2023.

Once we have filled in the holiday days, we just need to click the Remove Holiday Schedule button or go to the top bar and select EduSched Generator/ Remove Holiday Schedule and wait for the confirmation message.
⚠️ The process of removing holiday days can be quite slow. If you include many periods with many days and have a lot of events in your schedule, the program may exceed the execution time limit and be interrupted before completing the task. Google Apps Script limits the execution time to a maximum of 6 minutes. To avoid this, I recommend including fewer periods and repeating this process multiple times, changing the Start Day and End Day.
2.5. Generating daily class planning
To generate the class planning for a subject, we need to go to Daily Class Planning and select a subject from the list. Then, press the Generate Daily Class Planning button or go to the top bar and select EduSched Generator/ Generate daily class planning. After a while, it will ask for the name you want to give to the file.
This will generate a document in “My Drive” folder. In this document, there will be a table with 5 columns: Session Number, Session Date, Unit, Session Development, and Materials.
I am aware that it is not the best template in the world for creating a class planning 🤷🏻♂️, but at least, if you use another template, you can copy and paste both the session column and the corresponding dates.
3. Videotutorial
🔜 Soon, I will create a video explaining how to use the application to make it more dynamic. Feel free to check it out here.
4. Personal data
When using the application for the first time, you will be prompted to authorize a series of actions. This is because it creates and manages calendars on your behalf, and it requires your permission to do so.
Under no circumstances does the application record your personal data or send it to me or any third parties. All the data you enter is stored in the same spreadsheet, of which you are the owner, and it is stored on Google servers.
If you have any concerns regarding this, you can refer to the Privacy Policy.
5. Final Considerations
Well, that’s all for today. I appreciate that you’ve made it this far, and if you use the application, please leave a comment and let me know. I have dedicated many hours to developing the application and writing this tutorial, so it would be great to hear that someone is using it and finding it helpful.
I also want to reiterate what I mentioned at the beginning of the post, if you find any errors or have any possible improvements in mind, please let me know!
Until next time! 👋