
Hello! 👋
It’s been a while since I last wrote here, the life of a teacher is not as it seems from the outside, those of you who work as a teacher know it all too well—there’s a lot of work outside of hours, and often, we don’t have time to do everything we would like. That’s why I haven’t found the moment to write until now.
Today, I bring you a tool that has helped me a lot in grading tasks. I use it when I want to conduct peer-assessment or self-assessment, or even when I want them to assess how other classmates have worked in a cooperative task. With this tool, we can automatically obtain their ratings made with Google Forms and detect if someone, mistakenly or intentionally, has evaluated more than once.
It’s not a formative assessment tool; it’s a grading tool. Therefore, for it to be effective, it must be accompanied by feedback among them. Depending on the activity, we can use different tools to provide this feedback: through comments on documents, creating a document of possible improvements accessible to the evaluating students, or even providing this feedback orally. After this feedback, there should be time given to improve the work and finally, once reviewed, grade it.
⚠️ If you find any functional errors or have any improvements in mind, I would be delighted to read them in order to implement them in a new version. You can leave them in the comments.
1. Features
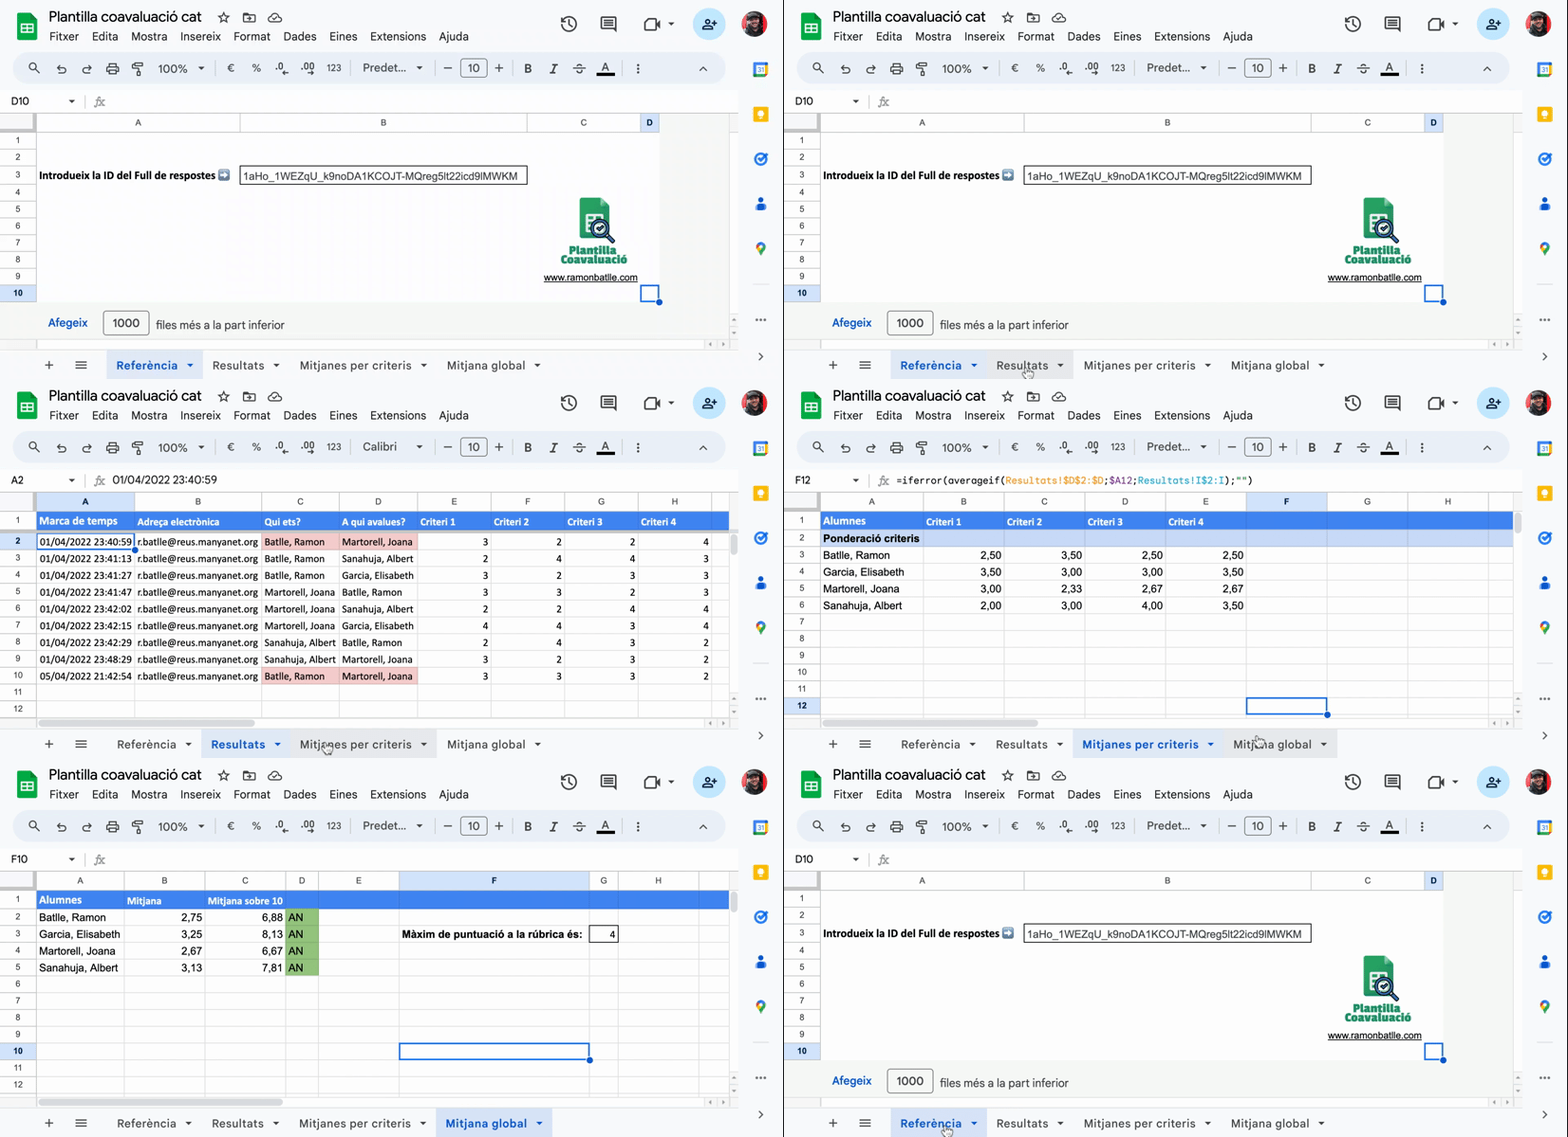
These templates allow you to automatically obtain student’s grades who have peer-assessed or self-assessed a task through Google Forms. It works for both assessing an entire group and assessing an individual. It calculates averages for the different criteria established in the rubric, as well as an overall average.
It also detects duplications, allowing their removal, and enables the setting of different percentages for each element in the assessment rubric for the calculation of the final grade.
Both templates work in the same way; the only difference is that in the peer-assessment template, the input form includes two names (evaluator and evaluated), while in the self-assessment template, there is only one name (evaluator=evaluated). The tutorial was done using the peer-assessment template.
2. Operation Guide
2.1 Creating the form where students will grade
For proper functioning of the template, the form must also be created and configured in a specific way.
In the case of conducting Peer-Assessment, the form should contain the following questions:
- An image of the rubric (not mandatory, but it will be very useful for grading and remembering the criteria)
- A dropdown where they choose who they are: I advise you to take the list of students from a spreadsheet and copy and paste it into the dropdown, so they can select the name. If you allow them to type their name, they will likely write it differently, and the template may not work.
- A dropdown where they choose who they are assessing, for the same reason, you can duplicate the previous question and change it.
- As many questions with a linear scale as the number of criteria in your rubric.
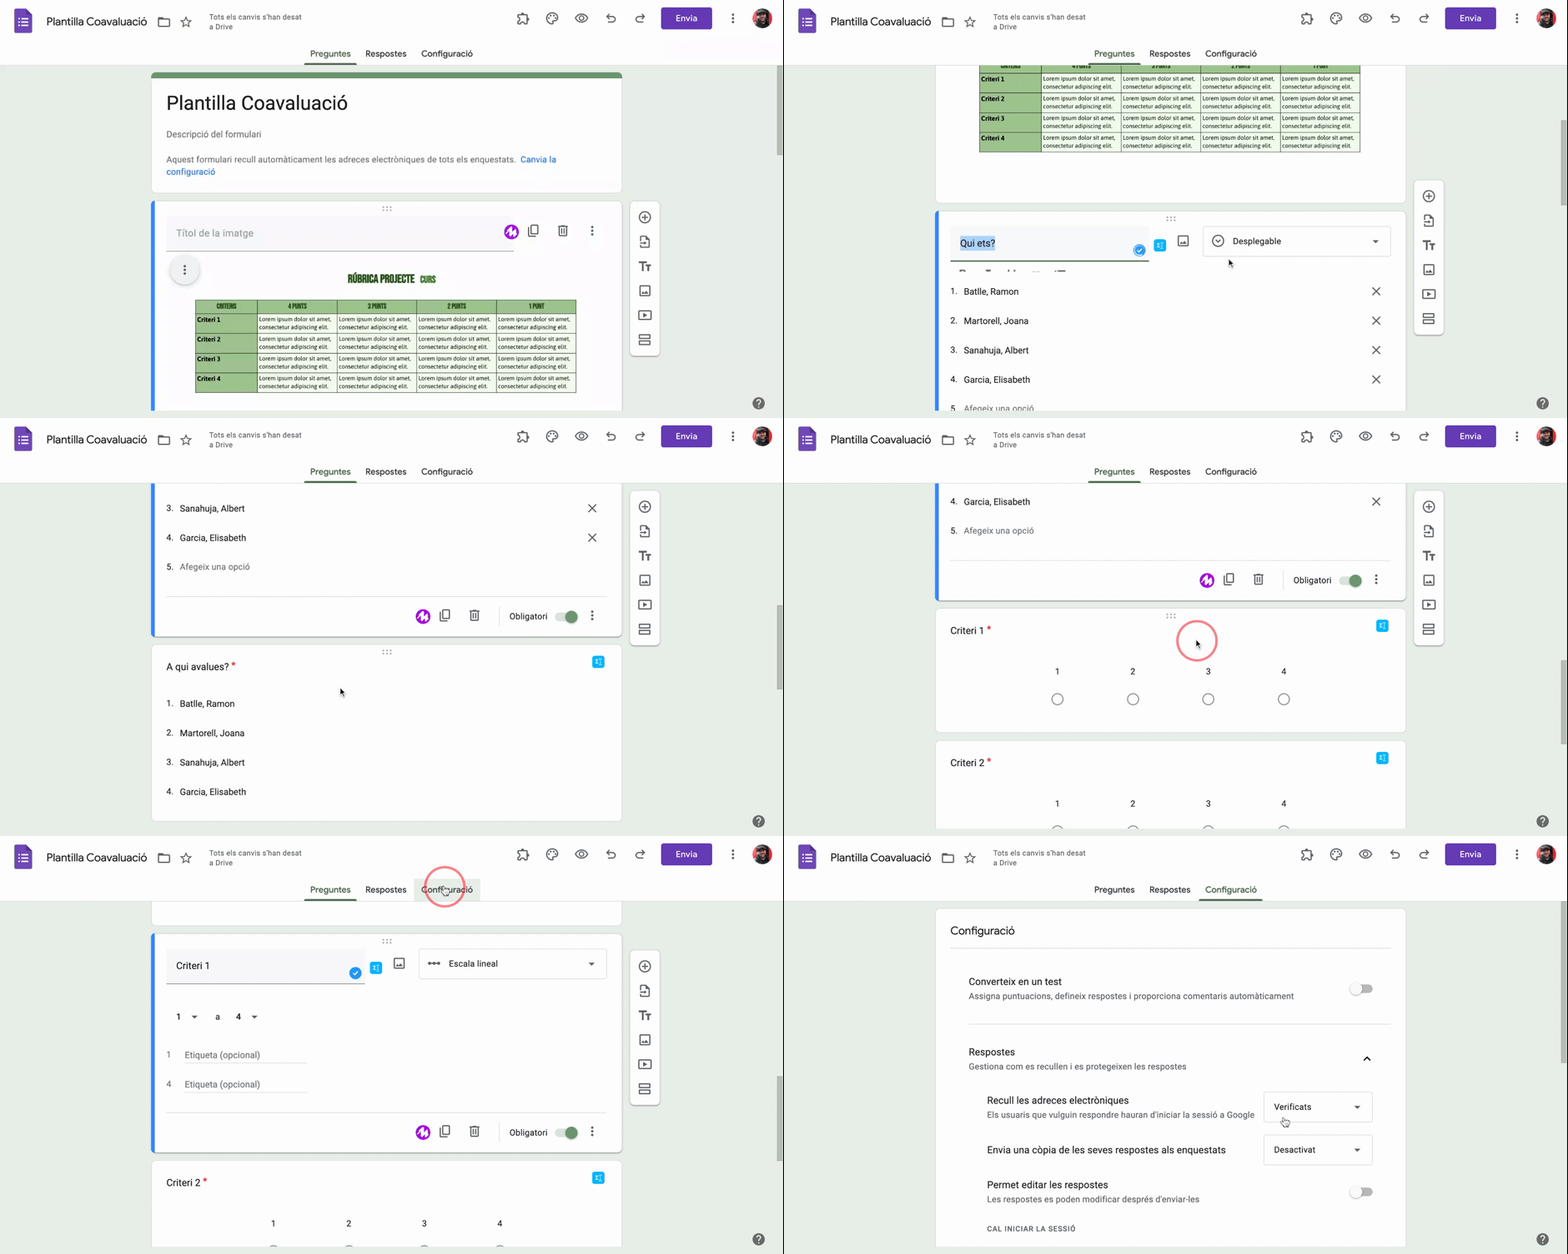
In the case of conducting Self-Assessment, the form would be the same, but we would only include a unique dropdown for the student’s name.
It’s also important to verify that email addresses are being collected. To do this, go to Settings/Responses/Collect email addresses and select Only accept email addresses.
2.2. Export data to a spreadsheet and copy the spreadsheet ID
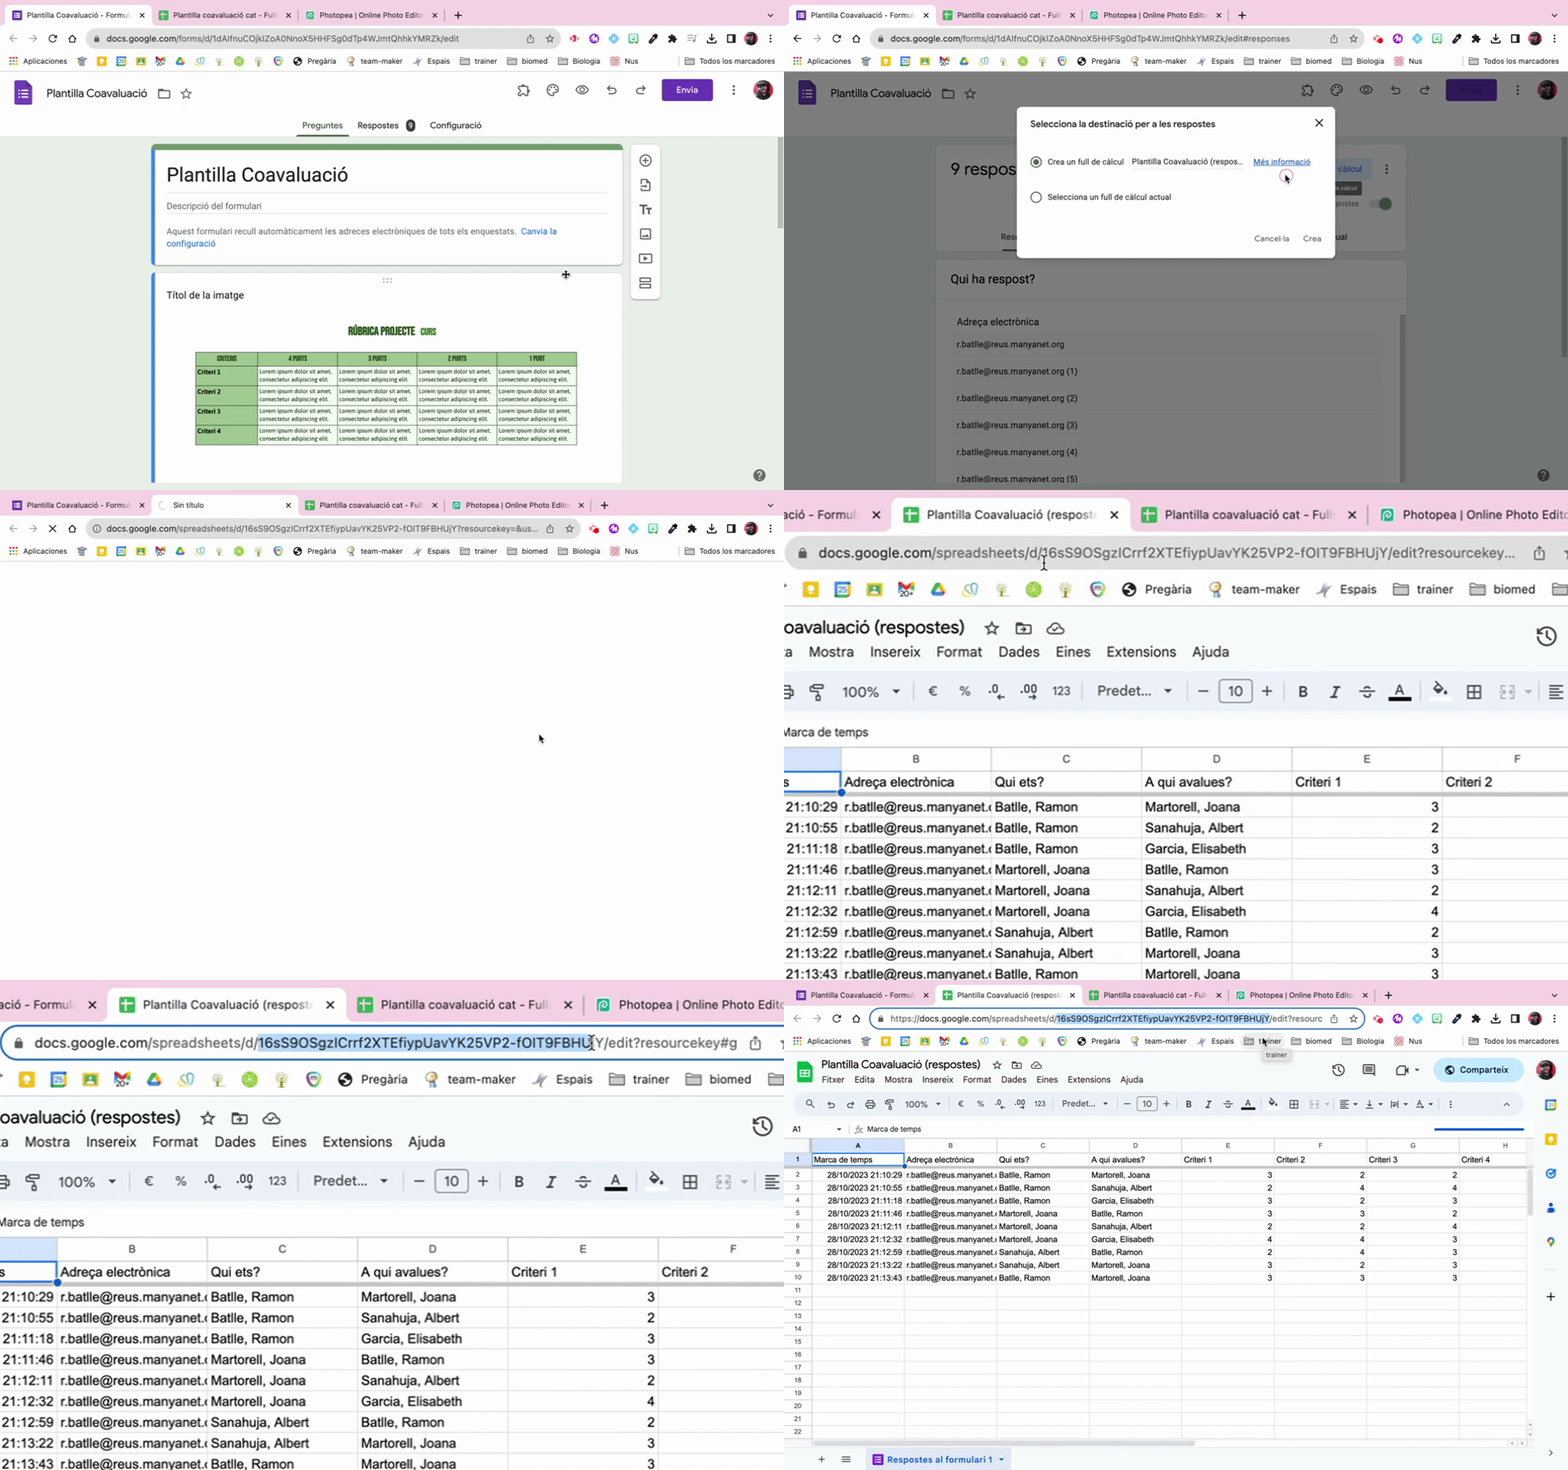
Once the students have filled out the form, we need to export the responses to a spreadsheet. To do this, you have to go to Responses/ Connect to Sheets and select Create a new spreadsheet.
We also need to copy the spreadsheet ID. This code can be found in the browser’s address bar, between the letters /d/ and /edit. Just as shown in the image on the left.
2.3. Template Operation
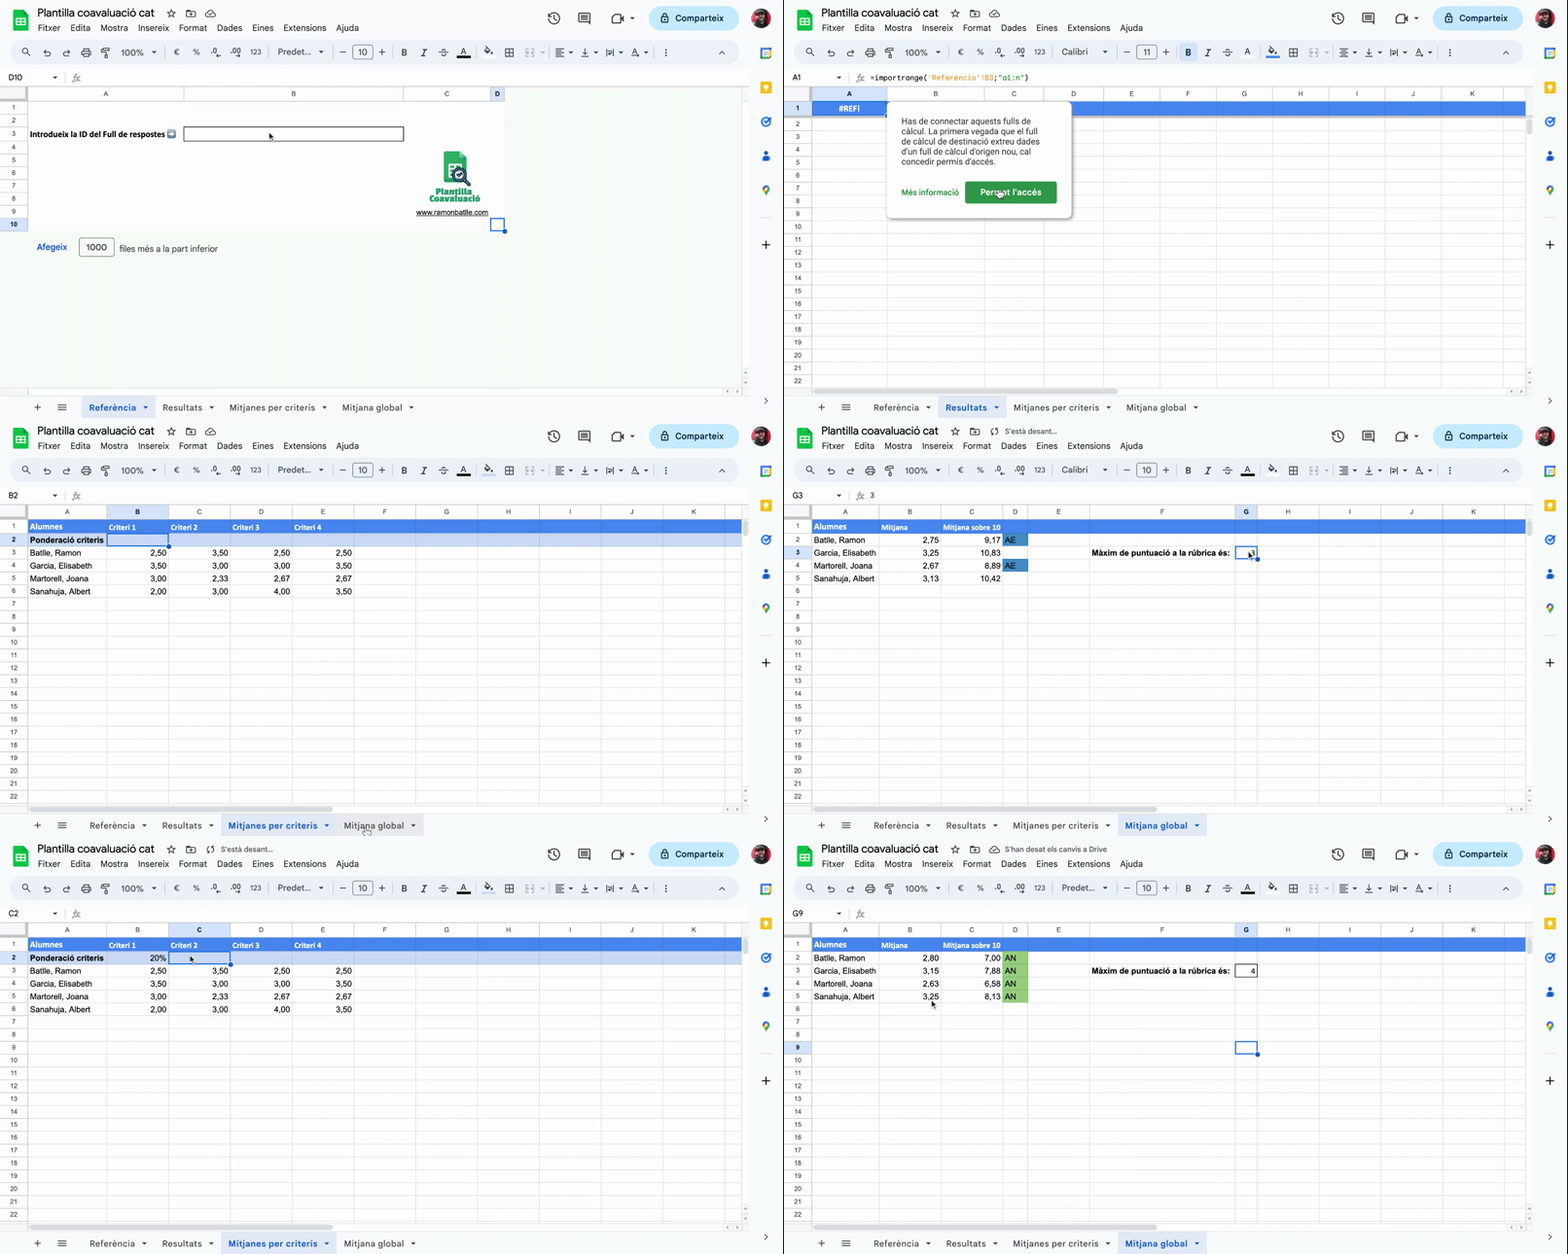
Now, all that’s left is to open the template and paste the spreadsheet ID in the cell indicated on the Reference tab.
Once we do this and on the Results tab, it will ask for permission to import data from another spreadsheet; we grant permission.
The template has two other tabs: Averages per Criteria, where we can see the average of each criterion separately, and the Overall Average tab, where we can see the overall average of the different criteria. In this tab, we can define the maximum score for each criterion to calculate the result out of 10; in our example, it’s 4.
Also, in the Averages per Criteria tab, we can weight each criterion differently. If left blank, it calculates an arithmetic average, but we can set different weights if desired.
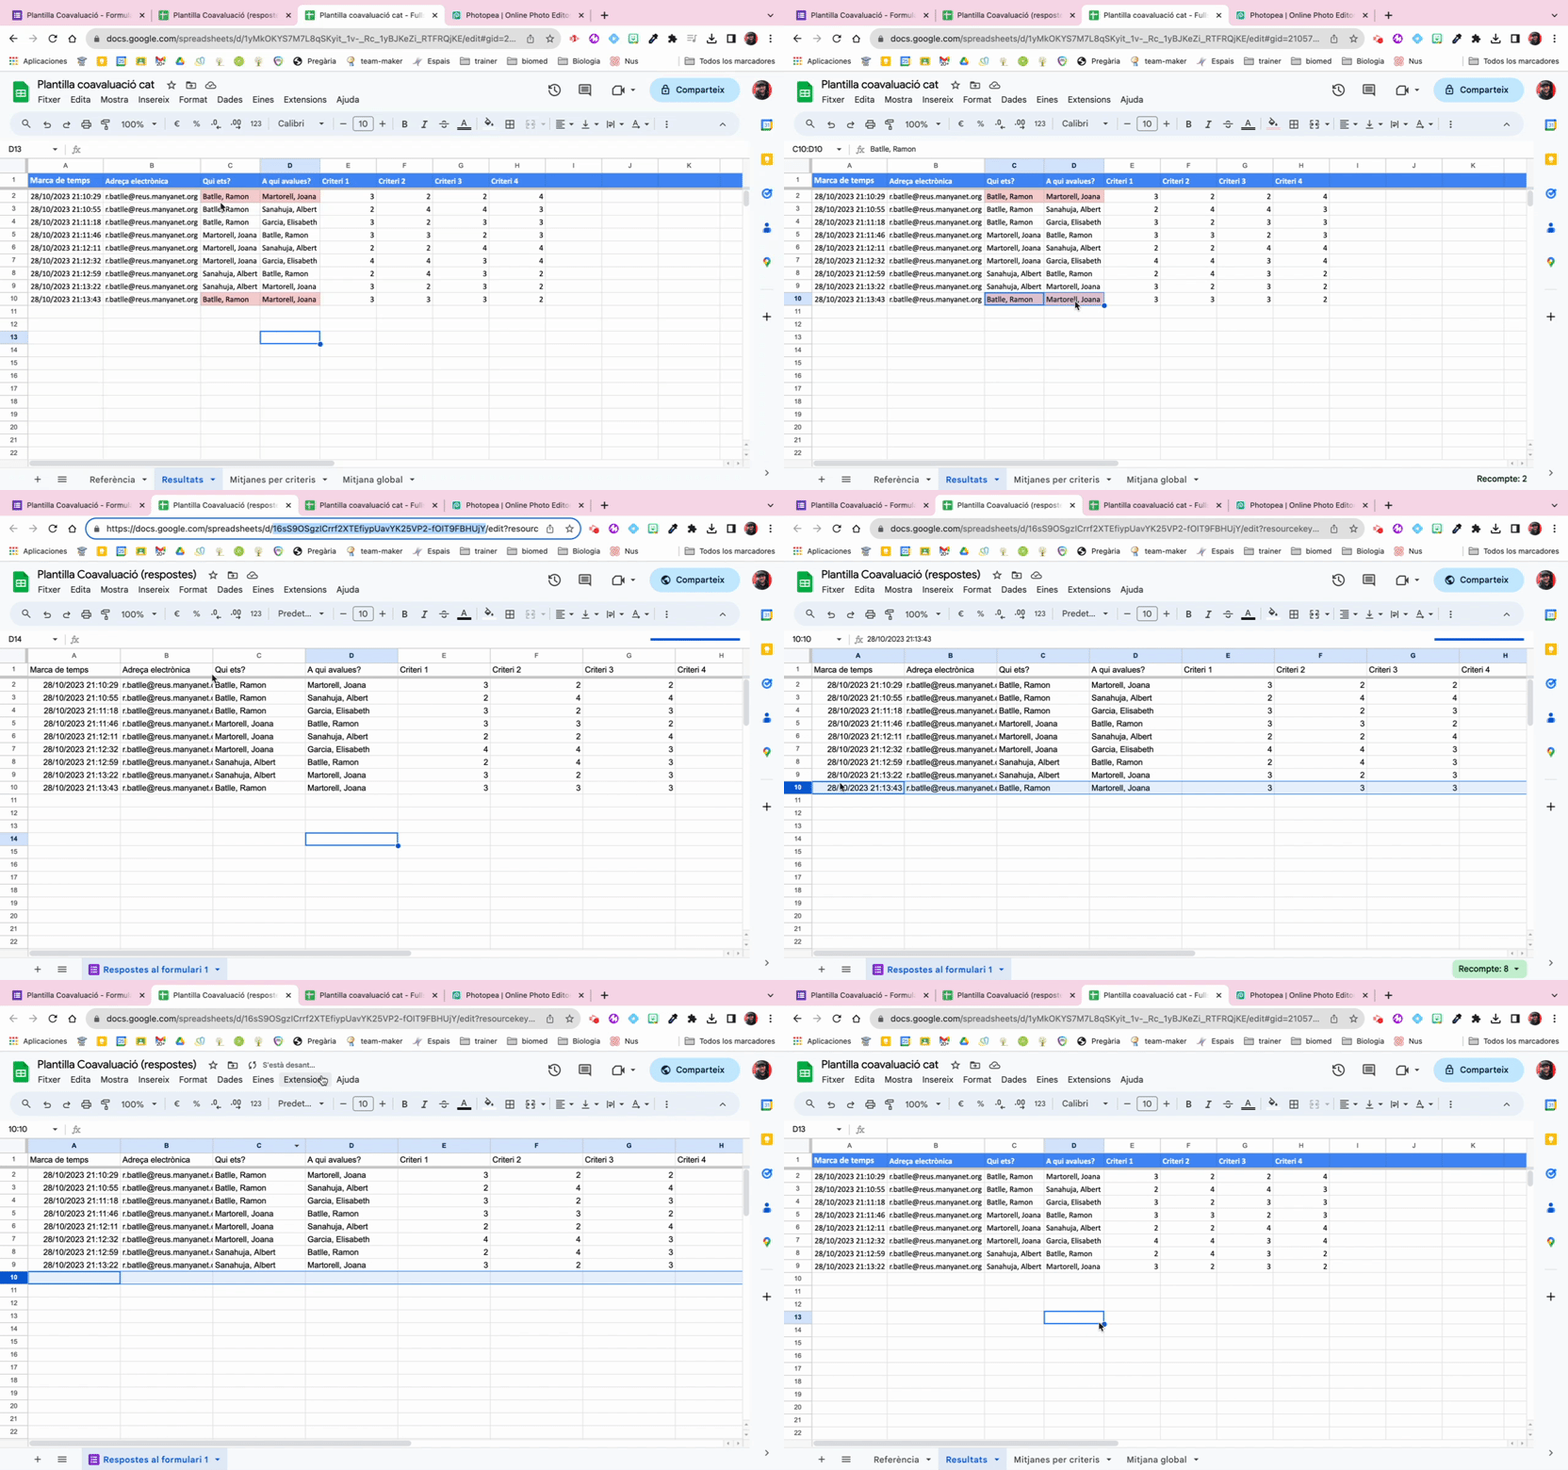
Finally, we can detect duplications for elimination. On the Results tab, if a student evaluates the same student two or more times, it will be highlighted in red. We should access the sheet generated by the form and remove this duplication.
3. Videotutorial
🔜 Soon, I will create a video explaining how to use the application to make it more dynamic. Feel free to check it out here.
4. Final Considerations
Thank you for reaching this point! If you use it, please leave me a comment and let me know. It would make me happy to find out if it’s helpful for you.
I hope not to take as long to write on the blog again and find more moments to keep it updated.
Until next time! 👋
